Bleaching your hair is an effective way to lighten its natural color, remove unwanted tones, or prep your locks for a bright dye job. While best left to professionals, it is possible to safely bleach your hair at home using hydrogen peroxide if you follow the proper techniques.
Peroxide allows you to strip out melanin pigment from your strands to create a lighter shade. However, bleaching can be damaging if not done with care. Here is a complete walk-through of how to carefully bleach hair at home, from mixing your formula to post-processing care.
Why Lighten with Hydrogen Peroxide?
Hydrogen peroxide has long been a household staple for DIY hair lightening. As an oxidizing agent, hydrogen peroxide reacts with the melanin in your hair, breaking it down and removing color pigment.
This is what allows you to go from brunette to blonde or remove those old highlights. Peroxide offers a budget-friendly option for subtle, gradual lightening when used correctly. While professional bleaching is best for dramatic looks, you can safely lift your hair a shade or two with hydrogen peroxide.
It’s important not to overdo it and go overboard with high volumes though, as this will damage your strands. The key is starting low and being patient. Follow all precautions and you can enjoy subtly lightened tresses.
Understanding Developer Volume and Strength
The strength of hydrogen peroxide is measured in percentage and developer volume. Volume refers to the concentration of peroxide in the solution. For at-home bleaching it’s best to use low strengths of 10 or 20 volume developer, which is equal to 3% and 6% hydrogen peroxide.
Higher volumes like 30 or 40 contain too much peroxide for DIY use at 9-12% strengths. They will damage hair by over-lifting the cuticles aggressively. Here’s an overview of peroxide developer volumes:
- 10 volume or 3% – Very mild lightening of 1-2 shades. Least damaging.
- 20 volume or 6% – Moderate lightening of 2-3 shades. Still low peroxide.
- 30 volume or 9% – Dramatic lifting of 3+ shades. High peroxide risks damage.
- 40 volume or 12% – Extreme lightening of 4+ shades. Very high level is for pros only.
For your first DIY bleaching session, it’s best to use no higher than 20 volume developer. This will gently lift your hair while minimizing damage. Always start with the lowest volume needed to get your desired results.
All About Hydrogen Peroxide Bleach Kits
There are a variety of ready-made bleach kits on the market that contain hydrogen peroxide in safe, beginner-friendly formulas for lightening hair at home. Most come with powdered lightener (bleach) and a volume developer. Popular picks include:
L’Oreal Paris Superior Preference Lightest Blonde
Clairol Born Blonde Maxi
Revlon Colorsilk Luminista in Pale Blonde
Schwarzkopf Blond Me Blonde Toning Kit
Garnier Nutrisse Ultracolor in PL1 Baby Blonde
Splatt Bleaching Kit
Wella Color Charm Lightest Pale Blonde
Follow instructions carefully and don’t exceed recommended processing times in the kits. It’s better to under-process and tone later than risk damage by over-bleaching in one session. And know your hair’s base shade and tone to select the right kit variation.
Allergy Testing – A Crucial Preliminary Step
Before applying any hydrogen peroxide bleach concoction to your full head of hair, it’s imperative you do an allergy test. Some people can have adverse skin reactions to peroxide. You want to avoid unpleasant surprises down the line.
Mix up a bit of your planned bleach formula, dip a cotton swab or gloved finger in, and dab on the inside of your elbow. Cover the area with a bandage and leave it for 24 hours.
If any itching, redness, or irritation develops, you have sensitivities. Rinse immediately if you notice any reaction. If the bleach patch causes no issues after a full day, you can safely proceed to lighten your locks.
Protecting Vulnerable Areas like Scalp and Ears
When applying bleaching products, two areas that need protection are your scalp and ears. The delicate skin here can become red, itchy, and inflamed if peroxide makes contact. Prevent this by creating a barrier.
Before lightening, apply petroleum jelly generously along your hairline, over your ears, and sideburns. You can also dot the skin on your temple and the nape of your neck. This prevents harsh chemicals from touching and irritating these zones.
Use a disposable applicator or popsicle stick to smear on petroleum jelly. Don’t pull at delicate skin. Make sure no bleach will be able to reach the protected areas. Rinse skin gently after processing.
Sectioning Hair for Even Coverage
To ensure every strand gets saturated evenly when you lighten, it’s essential to section off your hair cleanly and methodically. Start by parting hair into four quadrants – the back, two sides, and top/front. Use clips to keep other sections out of the way as you work.
Begin applying bleach at the back center of your head, taking horizontal subsections about 1 inch wide. Use a tint brush to thoroughly saturate these strands with lightener root to tip. Move methodically up the back until all hair is covered.
Unclip one side section and repeat the subsectioning process, coating all hair from roots to ends with bleach. Repeat again with the other side, then finally the top and front hairline. Keeping sections separated means guaranteed lightening coverage. No missed spots!
Avoid Overlapping
As you apply bleach, be vigilant not to coat strands that were already processed with new products. Bleaching the same sections twice can create uneven splotches. You want uniform lightening all over.
Make your parts very precisely as you work through quadrants. Don’t allow any previously lightened hair to mix into virgin sections. Cover only new strands with each bleach application to prevent uneven overlap marks.
Rinsing Thoroughly After Bleach Processing
Once you’ve coated all hair with bleach and allowed proper processing time, it’s vital to rinse very thoroughly before applying any conditioner or other products. You want to remove all traces of hydrogen peroxide from your strands.
Use warm water initially to help emulsify the lightener, then switch to cool water. Give your locks a good 5-10 minute rinse, until water runs completely clear and you don’t see any bleach residue.
This eliminates the chances of irritation from bleach left on the hair. Thorough rinsing also prevents uneven secondary lightening that can lead to splotches. So take your time and flush hair well post-bleaching.
Deep Conditioning Your Locks Post-Bleach
Bleaching is inherently drying to the hair. To restore moisture and smoothness after lightening with peroxide, you need to infuse hydration back in with a good deep conditioning treatment. This nourishes strands and rebuilds bonds.
Choose a hair mask or ampoule treatment made specifically for chemically-processed or damaged hair. Look for intensely hydrating ingredients like:
- Natural oils – argan, olive, almond, coconut
- Plant butters – shea, cocoa, mango seed
- Ceramides to strengthen
- Silicones for added slip
- Hyaluronic acid to bind moisture
- Silk proteins or hydrolyzed keratin
Apply your chosen restorative mask liberally from roots to ends after bleaching and let sit for 10+ minutes under a shower cap before rinsing out. Follow with a hydrating shampoo and lighter conditioner. Make this intensive treatment step part of your post-bleaching care.
Allowing Proper Time Between Bleaching Sessions
Crucial to maintaining integrity and shine in lightened hair is allowing enough recovery time between bleach applications. Bleaching too frequently will compromise your strands.
Limit DIY bleaching sessions to no more than once every 4-6 weeks. Your hair cuticles need time to close and regenerate between lightening. Going longer than 6 weeks is best for overall hair health.
Additionally, don’t leave bleach on for longer than instructions state to avoid over-processing. It’s less risky to under-process and tone later than to risk damage by overdoing it. Let your hair rest and recoup before hitting it with bleach again!
Pre-Testing Strands Before Full Head Application
Before committing to bleaching all your hair, it’s wise to do a test strand first to gauge results and your hair’s tolerance. Take a 1 inch section in an inconspicuous spot and apply bleach just to these strands for the full processing time.
This will show you accurately how light it can go in one session. If the test piece seems undamaged and lighter than desired, you can proceed to full head application knowing your hair can handle it.
But if the strand seems compromised and you want it lighter, modify your mix or method before applying to all hair. Strand testing gives you information to better calibrate the process for your hair’s needs.
Consulting a Stylist for Dramatic Changes
If your goal is to transition from brunette to platinum, going gradually with careful bleach sessions spaced 4-6 weeks apart is imperative. But attempting to drastically lighten all at once risks major damage.
Consult a trusted, experienced colorist if you want to lighten your base more than 3-4 shades overall. They have professional lighteners, toners, and bonds to protect hair through dramatic lightening over multiple visits.
Doing minor root touch-ups between salon visits saves money. But leaving the major transformations to a skilled colorist is wise to prevent harm to your hair health from overzealous bleaching.
Using Purple Shampoo to Neutralize Yellow Tones
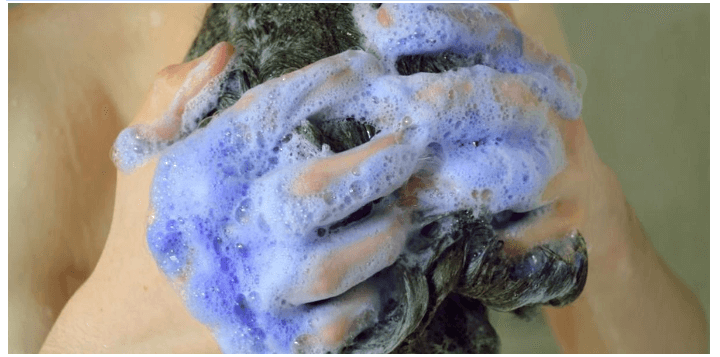
After bleaching, your hair may take on undesired brassy yellow or orange undertones. This is especially common for those with darker hair being lifted lighter. Not to worry – you can neutralize these tones at home with purple shampoo.
Look for shampoos that contain violet, blue, or silver pigments. These cool tones are opposite yellow on the color wheel, effectively canceling out warmth. Lather the purple-hued poo into your hair and let sit 1-5 minutes before rinsing out.
Use purple shampoo 1-2 times per week between bleach sessions to keep color crisp. The violet pigments will neutralize any unwanted golden hues for beautiful bright locks.
Gradually Lifting Hair Over Time For Less Damage
Trying to take your hair from dark to ultra light blonde in one session stresses your strands to the max and often leaves hair fried. The healthiest approach is lightening your mane gradually over several months.
Going up just 1-2 shades lighter with each bleach session spaced 4-6 weeks apart is gentler on your hair’s condition. Removing pigment slowly keeps damage to a minimum so you don’t have breakage.
Be patient with the process and don’t try to push the limit. Use the lowest volume peroxide developer that will get your hair to the next shade up. Over time you’ll eventually achieve your desired brighter blonde with shine intact!
Caring for Bleached Hair Between Applications
To keep your lightened locks healthy and improving progress between bleaching sessions:
- Use sulfate-free shampoo and a good conditioner
- Deep condition 1-2 times per week
- Use an overnight hair mask for added repair
- Sleep on a silk pillowcase
- Limit heat styling and tools
- Avoid chlorine and salt water
- Apply a weekly hair serum or oil
- Get occasional trims to remove split ends
- Brush gently starting from the bottom up
- Upgrade your shower filter to remove minerals
With some TLC between bleaching, you’ll better maintain the integrity of your strands. Handle lightened hair gently and keep deep conditioning!
What NOT to Do When DIY Bleaching:
Now that we’ve covered techniques and tips for safe at-home lightening, here are some key things to avoid:
- Don’t overlap lightened sections with new bleach product. This causes unevenness.
- Don’t wash hair with hot water or harsh shampoos after bleaching. Use cooler water and gentle cleansers.
- Don’t brush wet, fragile post-bleach hair. Always use a wide-tooth comb gently.
- Don’t bleach right after chemically straightening or relaxing hair. Wait 6-8 weeks first for healthy regrowth.
- Don’t apply bleach to already irritated, damaged, or broken scalp.
- Don’t wash hair immediately after lightening. Give your strands 2-3 days to recover first.
- Don’t use higher volumes than 20 developer at home, especially for your first bleaching session.
- Don’t leave bleach on longer than instructions state. Rinse promptly once processing time is complete.
- Don’t bleach hair again in less than 4 weeks. Lighten no more than once every 4-6 weeks.
- Don’t expect drastic color removal in one session. Gradual lightening prevents damage.
The Takeaway: Bleach with Caution
Bleaching your hair at home using hydrogen peroxide can let you subtly enhance your natural color when done with care and patience. Always start low and slow by using no higher than a 20 volume developer.
Work in sections, avoid overlaps, and rinse hair thoroughly after lightening. Deep condition post-bleach and wait at least 4 weeks between sessions. Seek help from a pro colorist for dramatic lightening goals vs. attempting such drastic change on your own in one step.
With smart techniques and the proper recipe, you can achieve minor brightening of your locks. Just remember to be extra cautious with previously colored or sensitive areas like the scalp and ears. Take it slow for shiny, healthy highlighted hair!

